Share
Pin
Tweet
Send
Share
Send
- Paraffin or wax candles (you can buy wax in specialized stores or shops for creativity; a cheaper option: buy ordinary candles in a supermarket) - the number of candles depends on the size of the future candle;
- Enameled bowl for melting candles;
- Napkins for decoupage (napkins are sold in stores for creativity in sets or one at a time, you can choose any suitable color or pattern) or decoupage cards;
- Tea spoon;
- scissors;
- The form in which the candle will solidify;
- Flavors (vanilla or cinnamon is great for pastry) or essential oil (lavender, mint, ylang-ylang, orange, juniper, cinnamon, etc.).
Work Stages:
1. Prepare all the necessary materials and tools for the job.
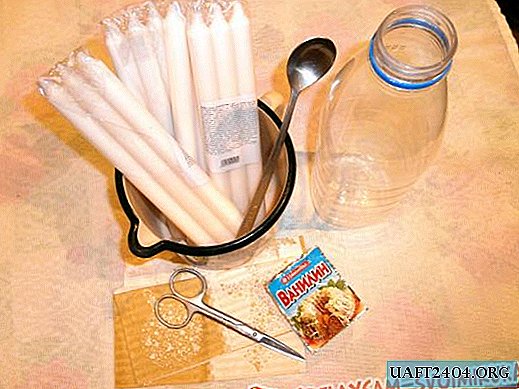

2. Break the candles into smaller pieces and put them in the dishes in which they will be heated. The wick, which is inside the candle, should not be thrown away, it will be useful in the process of making the candle. Leave unnecessary pieces of the wick, you can use them in the future when you make new candles. Melting candles takes 10-15 minutes. So be careful! Watch the heating process. The dishes in which the candles melted should be washed in warm water immediately after the transfusion of the wax.

3. Pour molten wax into the mold. Use a mold made of thick glass or plastic. The walls of the mold should be even and smooth, so that the candle can be easily removed, and it does not break. Add flavorings or essential oil. The wick must be fixed vertically in the center, for this you can use clothespins or bamboo sticks.

4. The candle should completely harden and cool. Only after that it can be taken out of the form. Time depends on the size of the candle. For this candle (height - 6.5 cm, diameter - 8.5 cm) it took about 10 hours.

5. It's time to decorate the finished product. To do this, you can use napkins for decoupage or decoupage cards. In this master class, napkins were used, as it is easier to work with them and they are great for working with candles. Cut out the necessary pattern. Napkins usually have 2-3 layers. You need to separate the topmost layer on which the image is located. Napkins are very thin, you need to be careful not to tear the napkin and not damage the pattern.


6. Attach the picture to the candle, then heat the spoon over the candles and swipe in a circular motion on top of the picture. Due to the fact that the wax will seep through the thin napkin, it will firmly adhere to the candle, and the edges of the napkin will become less noticeable.


7. Repeat these steps around the entire perimeter of the candle, apply all the prepared pictures. It is necessary to check whether the wax is evenly distributed throughout the candle. It is important, in the process of applying the drawing, not to make folds or indentations.
The candle is ready!

A unique and exclusive decoration for your home is ready! Place a candle near the bed or give it to relatives and friends! You will succeed! Good luck to you!
Share
Pin
Tweet
Send
Share
Send

