Share
Pin
Tweet
Send
Share
Send
Radio scheme
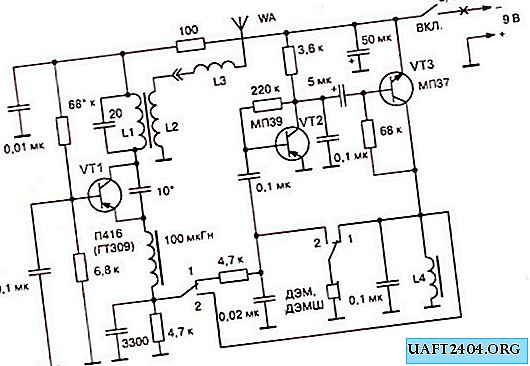
The scheme is simple, especially if you understand its work. I suggest you immediately visually divide it on the left side with one transistor and the right with two transistors. Transistor VT1 assembled the transmitter and receiver at the same time. When the switch closes the contacts "1", the radio is in receive mode and this transistor operates in the super-generative detector mode. And when the contacts are closed in mode "2" - this is the transmission and the transistor works as a master oscillator. With this, I think it’s clear. A simple low-frequency amplifier is assembled on the transistor VT2, VT3, which, depending on the position of the switch, either amplifies the signal from the microphone and transfers it to the transmitter, or amplifies the signal of the super-generative detector and transfers it to the loudspeaker. By the way, the loudspeaker and the microphone are one and the same element - a high-resistance DEM telephone capsule.
Radio Parts
Coil L1 is wound on a frame with a diameter of 8 mm with a ferrite core turn to turn and has 9 turns of PEL wire with a diameter of 0.5 mm. Coil L2 is wound over coil L1 and has 3 turns of the same wire. The L3 coil has a diameter of 5 mm and contains 60 turns of PEL wire with a diameter of 0.5 mm. As the inductor L4, you can use the primary winding of the output transformer of the transistor receiver.
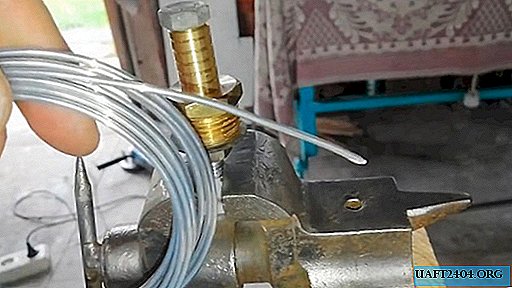
Antenna design

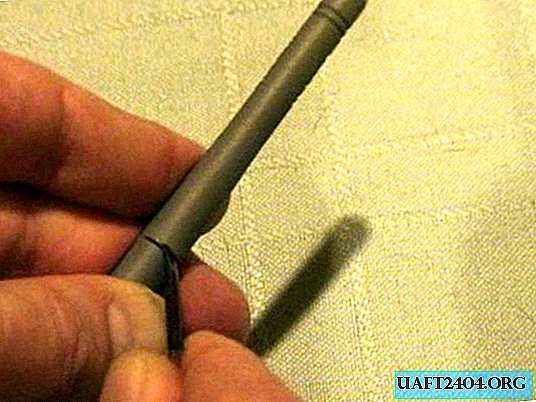
The antenna is made by me from a thick aluminum wire, with a piece of insulation, over which the L3 coil is wound.
My upgrade
I did this walkie-talkie back in school, but then I changed all the transistors to more modern ones and with a high gain. For example, I replaced VT1, VT2 with KT361, and VT3 with KT315.
Now, of course, I would change the power polarity and the polarity of the capacitors, replace all transistors from the n-p-n structure to p-n-p, and p-n-p to n-p-n. Well, I would install modern transistors. There are no particular requirements for transistors, so absolutely any will do.
The author of the scheme says that the radius of action of the same type of radium in an open area is 100-200 meters. I accelerated such radios to 500 meters, for this I used modern transistors, I increased the antenna to 900 mm, plus I increased the generator current, replacing the 100 Ohm resistor with 50 Ohm. Someone will say that it’s all because of the increase in the antenna, which I don’t agree with and say that I was able to communicate with the “native” antenna for 300 meters.
Customization
If you assembled the walkie-talkie correctly and from serviceable parts, then the whole setup will be reduced to tuning the L1 coil to a frequency of 27 MHz. This can be done with a subscript core, or with a capacitor in the circuit.

Lavrenko I. "Radio communication device" magazine "Radio amateur".
Share
Pin
Tweet
Send
Share
Send