Share
Pin
Tweet
Send
Share
Send
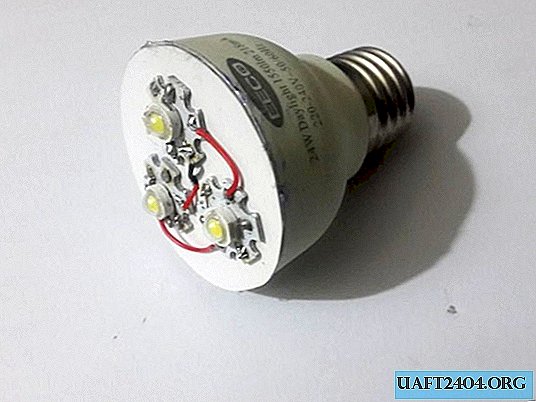
Energy-saving fluorescent lamps are not so durable and gradually fail. Their time is slowly coming to an end and they are being replaced by LED lamps. Led lamps consume significantly less energy, are more durable and not whimsical.
In this article I will show how easy it is to convert a fluorescent lamp into an LED. Home-made design will be no worse than purchased.
We assemble an LED lamp from an energy-saving fluorescent light bulb
We will need:
Inoperative fluorescent lamp.

A sheet of plastic or any other hard plastic. As an option - a plastic bucket from mayonnaise or ice cream.

Radiator with LED. You can buy from for a small price here: 1 watt LED and heat sink for LED. All items in three pieces.

Driver for powering the LEDs. Also buy - HERE.

We carefully disassemble the lamp without breaking the glass bulb.

The board with the details can be soldered to the elements and later used. A luminescent flask needs to be thrown away, but not in an ordinary trash, but taken to special points or a place to receive these lamps. In every city there are such.
As a result, we only come in handy here such a basement with a part of the case.

We cut out a circle from plastic, having previously drawn a cut line.


We solder the LEDs to the heat sinks with a soldering iron, after having greased the bottom of the LED with heat-conducting paste. We glue the radiators with LEDs on a circle of plastic with super glue.


We connect all three LEDs in series.


In the center we make a small hole and pass the power wires.

We connect the LEDs to the driver.

Solder the driver to the lamp base.

Insulate with tape or heat shrink.

The driver is placed inside. Glue a circle with LEDs to the lamp housing.


Everything is ready. We check by turning on the lamp in the network.


Shines just fine! Such a light bulb will last a very long time and will make significant savings for you, and therefore money.
Share
Pin
Tweet
Send
Share
Send

