Share
Pin
Tweet
Send
Share
Send
The modern market offers many types and varieties of axes, both domestic and foreign, in various designs and purposes. It is very difficult to choose the right one until you check it in action. Yes, and they cost a lot of money. Moreover, some unscrupulous manufacturers produce products that are outwardly attractive, but made of soft metal, and the ax is made of slippery and not durable plastic.
How to be I advise you to pay attention to the axes released many years ago. Usually they were distinguished by high technical and operational characteristics. If you have come across such a product, even if it is plain-looking because of a thick layer of rust covering the metal, this is what you need. Some skills, a set of tools, materials, time and work will turn the ugly duckling into a glorious swan.
Need for tools and materials
I will name tools that will facilitate and speed up the work, but in fact, you can do only with manual devices. It will just be a little longer and require more strength.
So you will need:
- manual metal brush;
- Bulgarian;
- belt grinding machine (grinder);
- mechanical jigsaw;
- Sander;
- grinding machine;
- vice and clamps;
- sandpaper;
- felt circle;
- calipers;
- pencil and ruler;
- wood file;
- hammer.
Do not do without the following materials:
- rusty old ax;
- a wooden bar of at least 50 cm in length;
- a small wood block for making a wedge;
- two small metal plates;
- suitable glue;
- water repellent;
- rags and paper napkins.
The process of restoring an old ax
It is necessary to visually verify that the ax has no through cracks and large chips. A more thorough check of the condition of the metal will be possible after the complete removal of the rust layer.

It is advisable to start cleaning the workpiece with a manual metal brush. To do this, the old ax is attached to the desktop with clamps. In this way, it will be possible to remove only the surface layer of rust, characterized by friability and fragility.

Then the cleaning continues using a grinder. To work faster, the disc should be kept at an angle to the work surface. This tool removes the main layer of rust from all sides of the workpiece, including the recesses and bends accessible to the disc grinder.


Next, the fight against rust must be transferred to a belt sander with an endless abrasive belt. Moreover, the operation must be continued almost until the complete removal of the oxidized layer. You should also carefully tune the cutting edge of the ax blade to remove small nicks and oxidized areas.


Manual removal of sand will allow you to completely get rid of rust, including sandwiches wound on a wooden block of suitable sizes, alternately clamping the workpiece in a vice or clamps. Non-removable tubercles, sharp edges, burrs and large roughnesses are carefully cut with a grinder.


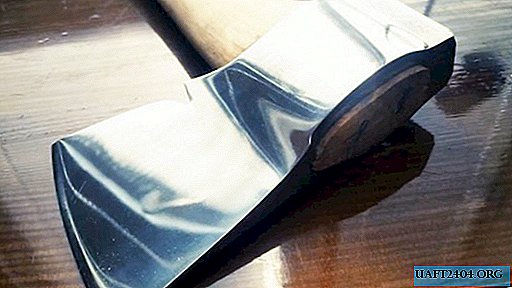
Finishing metal ax - polishing with a felt wheel mounted on the shaft of a grinding machine. This operation pursues mainly aesthetic goals. What a striking change with what is and was in the beginning!


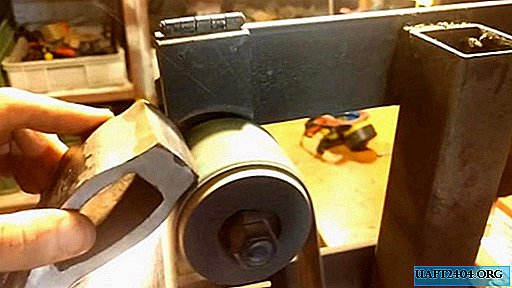
It's time to make an ax. To do this, using a caliper, measure the longitudinal and transverse size of the head to select a suitable wooden block over the cross section.

It can be made of hard wood: oak, birch, maple, ash, etc.
On one of the faces of the bar with the help of a pencil and a ruler, a profile of the future ax is drawn. Particularly carefully should draw the landing part, aligning it with the height and length of the ax cheeks.

Then, a wooden block, according to the intended contour, is processed on a mechanical jigsaw in length and width.


The blank for the ax is ready. Next, the ax is hastily mounted to the end of the ax from the landing side and is circled around the inner perimeter with a pencil.

Now comes the operation of processing the blanks with a file on the tree, from time to time, measuring the axial hole of the ax and the degree of processing of the ax.

After the sizes of the head and the landing side of the handle coincide, its processing continues with a file, then with a grinding machine and, finally, with sandpaper manually, holding the block in a vice.

A fairly responsible operation is cutting a groove under a wedge to the depth of an eye with a jigsaw machine.

After that, the ax is mounted on the ax by vigorous tapping on a hard surface until an end with a certain margin (about 1 cm) appears from the output side of the horse.
Next, a wedge of the appropriate size is made of hard wood: oak, walnut, yew, etc. Before driving in place, glue is applied on both sides of the wedge so that it sits firmly in the groove and does not pop out during operation. The wedge is clogged by lightly tapping the hammer until it stops. Then, the protruding part of the ax along with the non-clogged part of the wedge is cut off with a jigsaw.


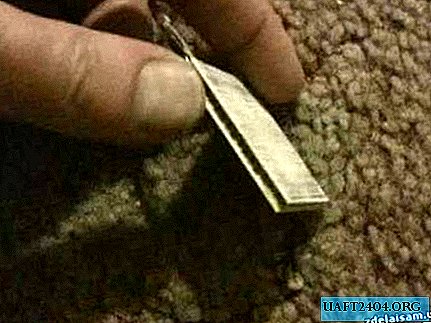
For greater reliability, two small metal plates are driven into the middle of the wedge at an angle.

The hatchet is treated with a water-repellent, and the finished product acquires not only a finished and attractive look, but also a complete willingness to work, starting from chopping firewood, and ending with carpentry.


Conclusion

The chamfer of the ax along with the cutting edge can be hardened if the steel grade of which it is made is known. To do this, just open the metallurgist’s directory and find the quenching mode by the steel grade found. As a result of such an operation, the tool will gain even greater strength and better working qualities.
You can strengthen the ax on the ax not with one, but with two or more wooden wedges, making, in addition to the longitudinal, two or more perpendicular cuts, and in all of them to hammer your wedge, starting from the longitudinal.
Share
Pin
Tweet
Send
Share
Send