Share
Pin
Tweet
Send
Share
Send
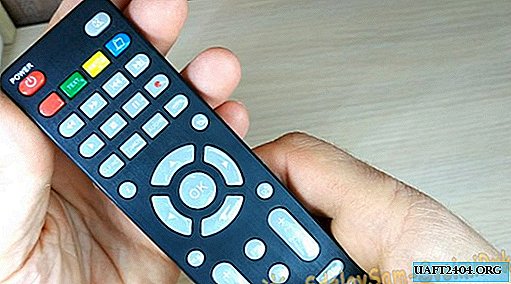
Nowadays, almost everyone in the house has electronic equipment that needs to be controlled using a remote control. With frequent use of the remote control, the characters printed on the buttons over time are erased, causing some discomfort with further use of the remote control.

Well, for example, look at this old man, how about you? Almost all the buttons were left without paint. And if you still manage to switch the channels somehow, then to go to the menu or, for example, switch the input of the device, you can make a mistake more than once before you find the right button. Of course, it’s hardly possible to save this remote, but you can protect the buttons of the new remote from such a fate.
There are several ways to protect the remote control, for example, you can just wrap it in a bag, you can buy a special silicone or shrink case, you can just buy a new remote when the old one becomes unusable. Each method has its own advantages and disadvantages. I offer you my way to protect buttons. Everyone can apply it, because for its implementation nothing complicated and expensive will be needed.
Will need
For revision we will need only a small piece of cling film, which is now in almost every home. Of the tools you need a clerical knife or a scalpel, any plastic card, preferably not needed, is also useful. Maybe someone will need a screwdriver.
The process of simple completion of the remote control
My method involves coating the buttons with cling film, for this you need to disassemble the remote control, this is certainly a minus of this method, but what can you do.
So, we take out the batteries and disassemble the remote control, pay attention to your remote control model, maybe there are screws in the battery compartment that need to be unscrewed, sometimes the screws can hide under stickers.

To easily disassemble the remote without damaging its fasteners, you need to sharpen the edge of the plastic card, insert it into the groove between the two halves and draw it from edge to edge, slightly swinging the card. At this stage, you must act carefully so as not to break the fragile fasteners. The same thing needs to be done on the other side of the remote.


After disassembling the remote control, you need to cut off a piece of cling film. The dimensions of the film should be with a margin. To create a more reliable protective layer, I fold the film in half.


Now our goal is to give the cling film a button shape. To do this, put it between the front of the remote control and the buttons.


Now you need to carefully push through each button, thereby giving the film a shape. It will be necessary to go through 2-3 times for each button. At this stage, you need to act so that the film does not move in the process. Otherwise, you have to start all over again.


All buttons are pushed, great. Now you can put the board and the second part of the remote control in place, pin down, but not snap. You should check whether all buttons are sold. If one or more buttons are poorly formed, the button contacts can touch the board, causing false positives for the remote control. If everything is OK, you can click.


Now it remains to remove the excess film, I used a clerical scalpel for this. The remote is now ready for use.


This is not my first remote control that I have improved in this way. I covered the bottom panel in the photo with a film about 1.5 years ago, as you can see the film is already wearing. The film is no longer on the power button, but then I used only one layer of film.


Of course, such a refinement is not eternal and the film will tear over time, but the replacement procedure takes only 15-20 minutes.
Share
Pin
Tweet
Send
Share
Send

